“Flat is a Must – Level is a Plus”
A Guide to Perfect (Or Near-Perfect) Floors

If you’ve spent time in the flooring industry, you may have heard the saying, “Level is desired, flat is required.” It’s a phrase I first heard years ago in the tile world, but it applies in flooring whether you’re working on vinyl, hardwood, epoxy or sometimes even carpet installations. And while it might sound simple, achieving floor flatness—or levelness when required—takes more than a bag of self-leveling compound and a prayer for the best. It takes planning, precise tools, and the right products.
“If it’s not flat – that’s where trouble’s at”
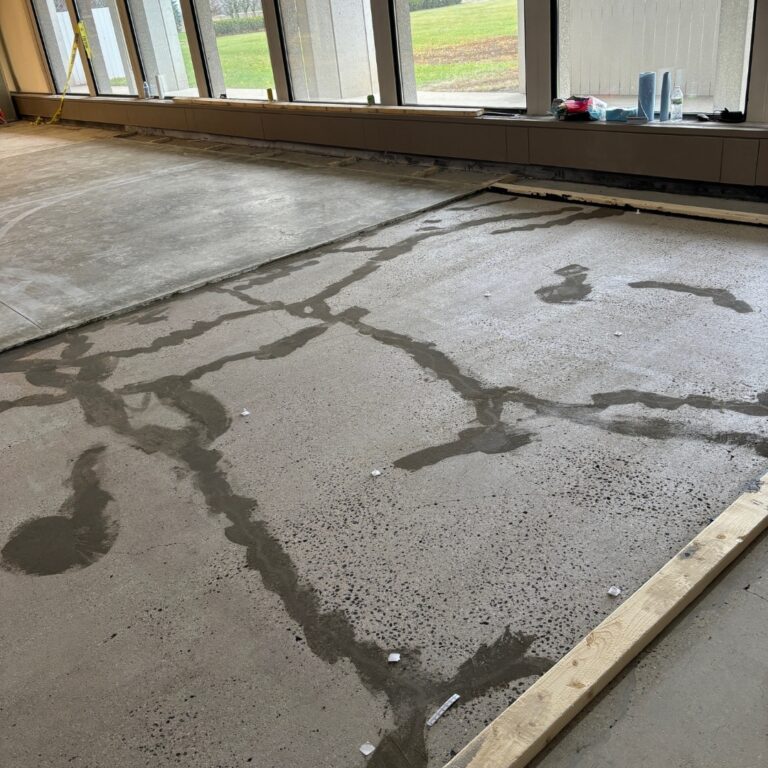
A few weeks ago, a specialty contractor called me about a large industrial space they were renovating. The floor had been through some real delays and challenges: cracked concrete, and waves in the slab like a roller coaster. Their team was great with epoxy and had some experience self-leveling but needed a plan to prep this floor correctly. It wasn’t just about making it flat; there was a specific area where the owner requested a truly level surface to accommodate some heavy equipment.
This is where the difference between “flat” and “level” becomes important. Flat means the floor doesn’t have undulations—it’s consistent and smooth across the plane. This is the requirement for most finished flooring types to avoid uneven wear, hollow spots, or an irregular finished surface. Level, on the other hand, means the floor is perfectly horizontal—this is critical for specific applications like machinery installations, medical equipment, computers or even walls and cabinets. At this stage of the process, we need to have a conversation with all decision makers. Understanding needs, and setting expectations are the primary goals.

Step One: Understanding Floor Tolerances. “Flat is the Base, Level adds Grace”.
Before we discussed application tools or specific products, we reviewed the flatness tolerances required for the flooring materials being installed, as well as the minimum and maximum depth needed. Most flooring manufacturers specify a flatness tolerance, typically 1/8” over a 6-foot span, or 3/16” over 10 feet. However, tolerances can be much tighter especially for industrial and healthcare applications. In the level areas, we needed to achieve a near-zero deviation—less than 1/8” over 10 feet. This isn’t an easy task, but we were ready.
Step Two: Inspect and Plan. “Flat is the Start, Level is the Art”.
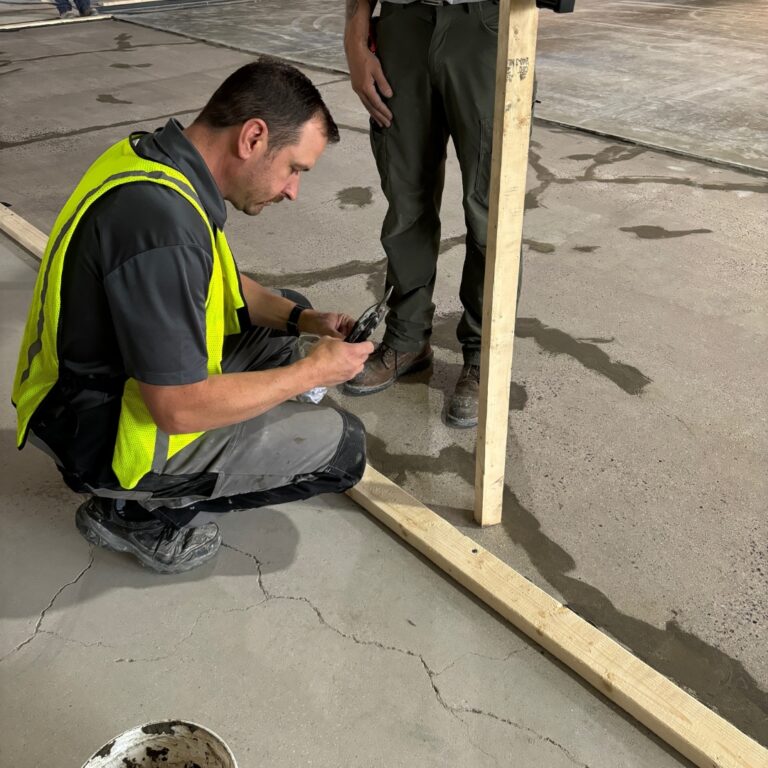
We began by walking the job site with a laser level on a tripod and a 10-foot straightedge. The laser gave us a better understanding of the floor’s high and low spots, and the straightedge helped verify those findings. This step isn’t just about locating problem areas- it’s about discovering the subfloor’s story—how it was poured, where it’s settled, and where repairs may have been done poorly.
Next, we mapped out the plan. For subfloor flatness, we focused on the big picture—matching existing transitions and eliminating waviness. For the requirement of achieving a truly level floor, we marked out zones with leveling pins. These small, adjustable markers allowed us to visually peg the floor for desired thickness of the self-leveling material precisely. This means during application we could consistently cover our leveling pins regardless of the existing irregularities that are hard to see.
Step Three: Tools of the Trade. “The right tools save time, and make the floor sublime”.
Here’s where the tools come into play. The hands and feet of an experienced flooring technician are the workhorse for determining floor conditions, but we also brought in a tripod and laser level to verify specific points of elevation. For the most precise measurements, some use a water level – a more rare but accurate method that relies on gravity to give you a true reading of level across long distances and around corners.
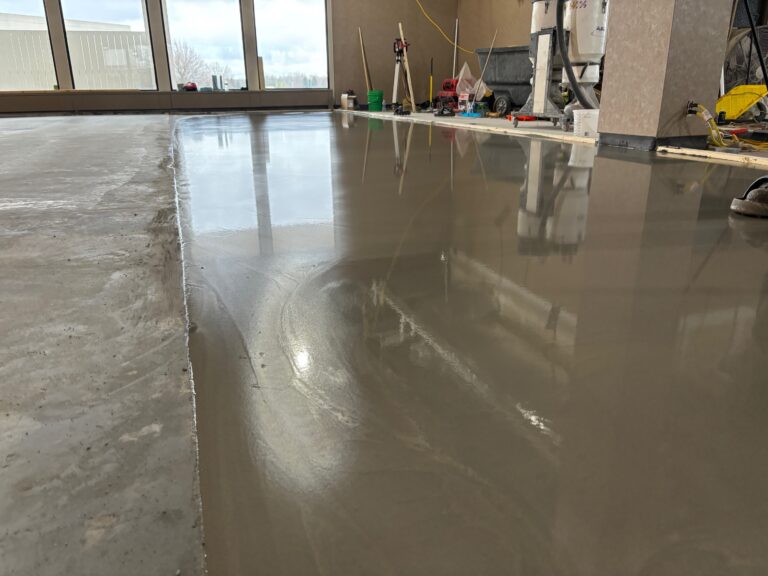
Leveling pins made applying the self-leveling underlayment much easier, especially in irregular areas requiring precision. And of course, we used Schönox’s FP trowelable primer and KH FIX to fill small depressions and prime at the same time. I recommended a Schönox fan favorite – ZM cementitious underlayment for a range of depths and full-scale ultra smooth results when leveling. With ZM’s easy flow and reliable cure, the results were as consistent as the plan we’d laid out.
Step Four: Execution “Pour together, work as one; a perfect floor when the job is done.”
One of the biggest mistakes I see in floor prep is skipping the planning phase and rushing ahead to pour self-levelers. The wrong tools, or lack of, can make even a skilled contractor look bad. But by carefully preparing the surface, priming properly, and getting our benchmarks set, the pour went smoothly. The contractor’s team worked together with my guidance, following the leveling pins and outer edge to ensure accuracy.

The result? A floor that was flat and perfectly level. The contractor texted me a photo a few days later after the flooring was installed, and it looked amazing. He mentioned how much easier the installation had gone because of the planning work we’d done together and proper selection of product for this application. Most importantly, the general contractor said the results exceeded his expectations, and he had great confidence knowing a manufacturing partner was involved to get them started.
Lessons Learned: “Stick to the goal, and the pour’s in control.”
I really have to give full credit to the flooring contractors. They did their homework and showed up a day early, completely prepared. Their tools and supplies were professional, clean, and well-organized, with everything from rollers to measuring buckets—and at least three of each essential item. Above all, their eagerness to learn, ask questions, and actually improve as subfloor specialists was inspiring.
This project was a great reminder of why flatness is always required, but level is sometimes desired. By taking the time to inspect, plan, and use the proper tools and products, we avoided costly mistakes and delivered a floor that met (and exceeded) every requirement and expectation.
Whether you’re a seasoned flooring professional or just beginning, don’t underestimate the power of preparation. A little extra time planning can make the difference between a job that’s “good enough” and one that’s truly exceptional. After all, regardless of the cheesy phrase you use to describe it… when the subfloor is done right, your skills and reputation will shine bright.
To view a reel of the project, visit this link:
https://www.instagram.com/jeremy_schonox/reel/DCaDBlqS7p_/?hl=en
Written by Jeremy Waldorf, Regional Business Manager


I used to cover many floors with Schonox products while with VMI in Houston and San Antonio. Initially, we used Schönox, but later switched to inferior products due cost-cutting by the contractor, whose name I will not mention. I definitely noticed a difference in the pour, smoothness, and flow of the cementitious underlayment, and the product made the job a mess. Consequently, I had to be moderately assertive and inform the contractor that I would not continue because my name would be associated with the job, even though I was not the flooring contractor. I convinced them to let me take over and only use Schönox products, including tools and equipment. In the end, everyone was extremely satisfied, and I could leave the job knowing that the floor was done correctly. I have worked on some severely damaged floors in my career, and one of the truest statements from your commentary is preparation and tools make the biggest difference on jobs regardless of their size.
Alfred Castillo
Hello Alfred. Thank you for your comments and for your dedication to Schönox. Industry professionals like you make a huge impact on our success, and we will continue working to ensure that your projects are a success when using Schönox subfloor solutions.